Classic Architecture Meets Sustainable GreenTechnology
Scarf Joint and Barn Update
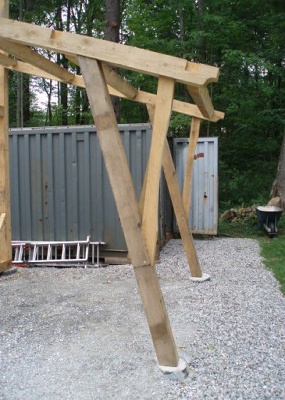
I have had some requests to give more detail on timber frame joinery, so I will attempt to highlight a specific joint
on each blog. In the oppressive heat and humidity of the past couple of weeks, I have cut and assembled the first
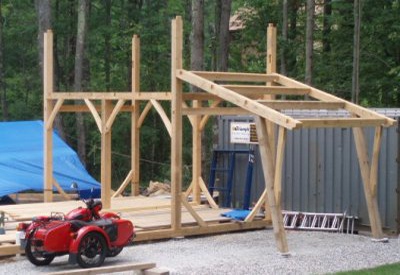
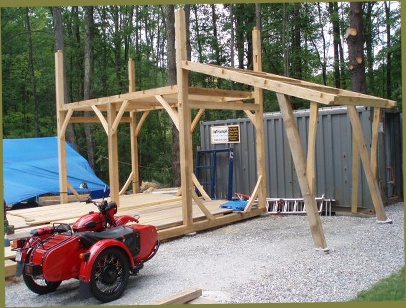
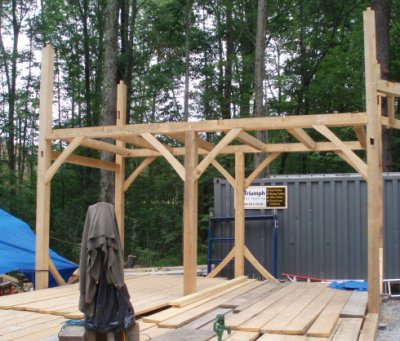
two bents of my own barn, along with the connecting joists, purlins, and tie beams. The main 2 story barn is 28'
long by 18' wide - very nearly a perfect golden section. There is an open section to this barn which is 10'-6" x 28'.
The vertical posts which make up the trusses for the open sections are white oak, used for their toughness and
weather resistance.
The last frame that I cut was in December, which I far prefer to this current weather, both for my own comfort and
because the hemlock is much more stable in the cool weather. I have been keeping all of the end grain coated with
parafin, to mitigate the twisting and checking that happens when timbers dry to rapidly. My friends who use
western, kiln-dried lumber, and metal connectors have some advantages in working with the heat, but I still enjoy
building a frame completely out of local wood using ancient technology. Here are some pics of the 2 bents that I
have up:
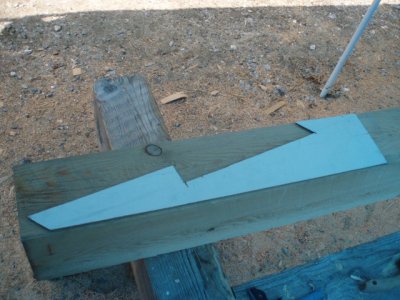
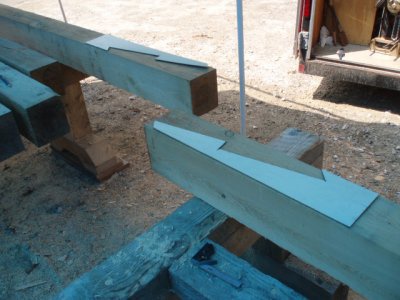
Now for the joinery portion of this blog, the following are the steps to cutting and assembling a "scarf joint",
which is a way to turn multiple shorter timbers into one long timber. We'll start with a couple of timbers and
plywood template to use for layout. Transfer the shape of the template to the timbers.
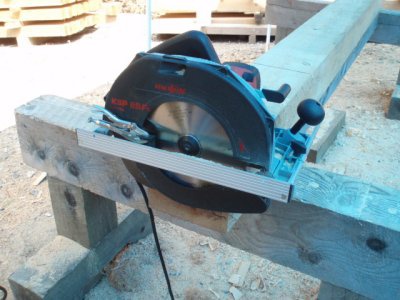
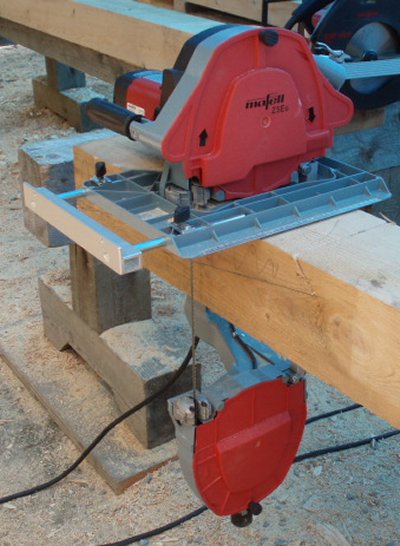
We'll need some tools to do the actual cutting. You can make do with a common 7" circular saw and a couple of
handsaws (rip and crosscut), but some specialized timber framer's tool make the job much more efficient. These
particular tools are made in Germany and their cost keeps them out of the hands of most folks that don't timber
frame full-time or close to it. We'll be using a 10" circular saw and a portable band saw with a 12" throat.
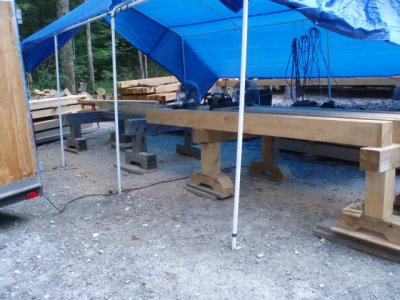
You'll want to have a couple pairs of heavy duty
sawhorses which are set up to describe a level
plane on their top edges. I am working under the
blue tarp with a couple of heavy duty fans to take
the edge off the heat.
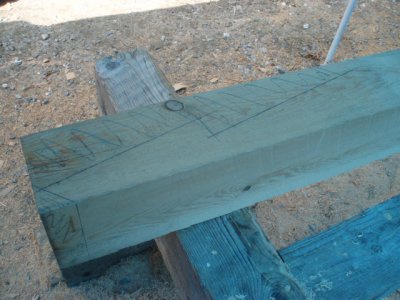
Here the timbers are in place and roughly fit. They
will need marking and careful trimming and planing
to get them dead straight and tight.
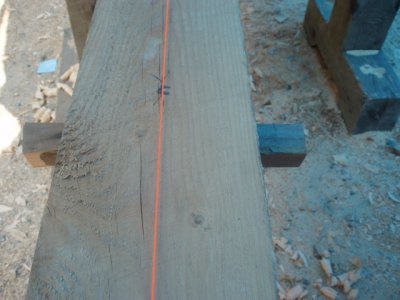
Check the straightness, both horizontally and
vertically with a string stretched from the ends. I
usually put a very slight crown in my scarfs (1/16"
in a 20' scarfed timber) to allow for settling. Two
opposing wedges keep the joint tight and
straight. I'll often use a contrasting wood for the
wedges - black walnut for instance in a hemlock
frame.