


Summer 2012 Update - Entryway Design, Demo, and Rebuild.
With a little extra time between client projects this spring/summer, I've finally started to rebuild
my own house. This house is a tricky project due to various factors: 1- The house was built in a
decent fashion around 1900, but was very poorly renovated just prior to my wife and I buying it.
2- I'm a fairly finicky designer/builder and don't seem to have the ability to work below a certain
level. 3- It's tempting to just leave it as is instead of facing the fact that renovating it means pretty
much demolishing all of the work that has happened to the house since it was first built, and
starting over.
Since we wanted to start with a project that would take less than a couple of months working
alone, and stay under a few thousand dollars out of pocket, my wife and I agreed that the front
entry way would come first. Even though this entry way will probably never be used more than
occasionally, it seems energetically important to the house in general and serves as a template of
what the rest of the house will look like.
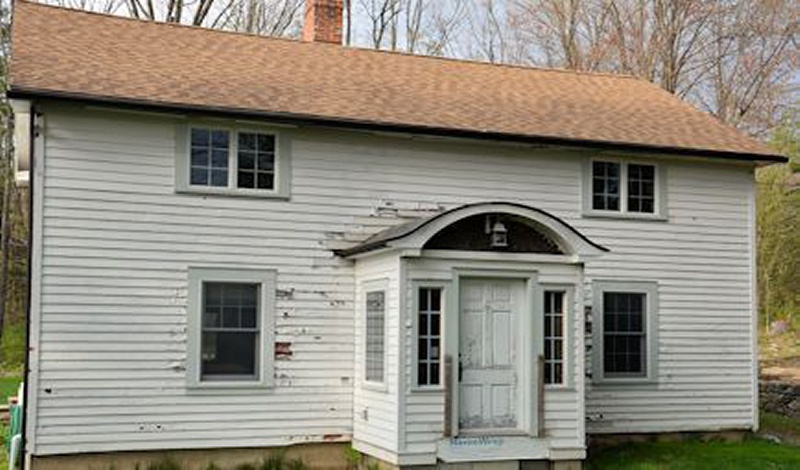
As you can see, the house in general is pretty unappealling:
disproportionate trim detail, cheap anderson vinyl clad windows, a
nasty front door, strange sidelights, brown asphalt roof, strange
window and door casing on the inside....The shape of the copper roof
on the entry is slightly interesting, but so poorly trimmed and
finished that it doesn't really work. The upper windows are badly
proportioned, and there is no entablature, or decent cornerboards,
or water table ...
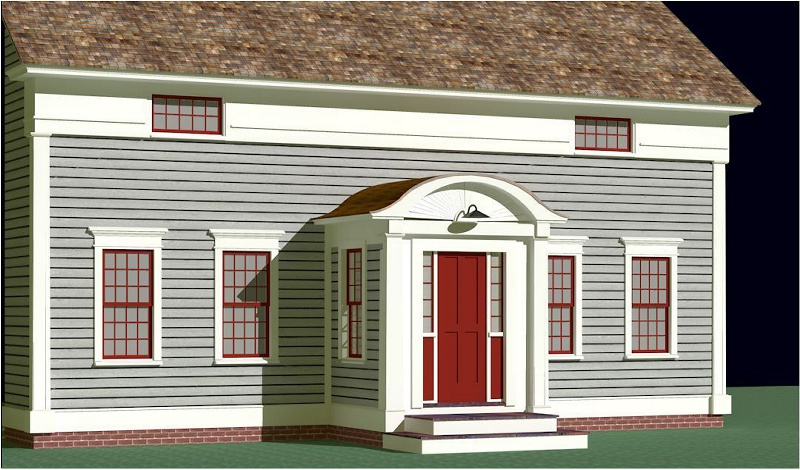
Step one for me was to generate a rough design drawing of what I thought that this house might look
like if it was built by a decent craftsman in around 1900.
This is what I came up with: 1- add
entabliture with windows contained
within it, 2- a nice level of trim with
columns on the front entry, 3- a very
simple porch to access entry, 4- nicely
sized windows with pediments, 5- a
water table board along the bottom, 6-
a nice simple front door with
sidelights, 7- a wooden roof, 8-
shutters to fill up some of the space
around the windows.
If this had been a client's project, I would have developed and refined the drawings further. Since I
was building it myself and in total control, I decided to start building and design on the fly. I enjoy
designing and building this way, as it feels more improvisational, like jazz, than completing a design
before building.
Since it was such an important part of this renovation, I decided to start on the door/sidelight unit. It
was an easy decision to build the door, sidelights, and lower panels from scratch. I'm not thrilled with
the quality of any of the commercially available units. I wanted: 1-simple design, 2- solid wood, 3-
weather resistant jambs, 4- high energy efficiency and durabilty, and have found that the the most
pleasant and economical way to get that is to build them. I also have a very nice shop that I delight in
using. I chose to build the door and sidelights out of cherry, with natural wood showing on the inside
and red paint on the outside. The inner panel would be cherry and the outer panel would be cedar for
weather resistance. The door and lower panels would be traditional mortise and tenon construction
with draw bored pegs, and I decided to use one panel of thermal glass on each sidelight with applied
grills instead of true divided lights. This was to allow a thinner look on the muntins. These pics should
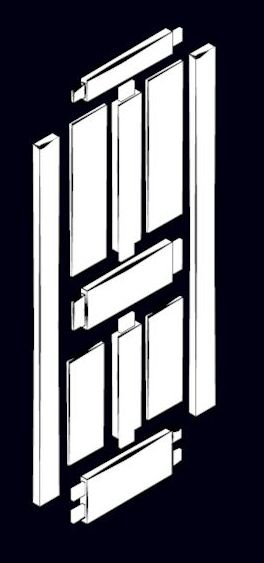
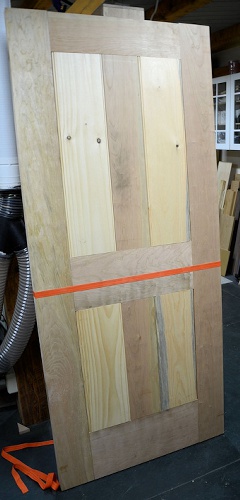
show basically how the parts are cut and assembled into their finished components.
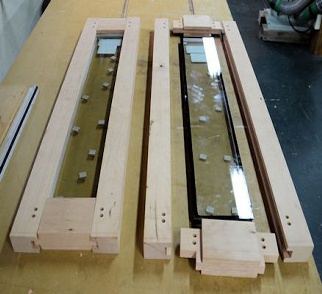
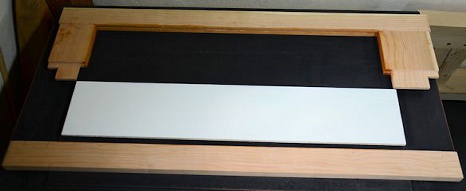
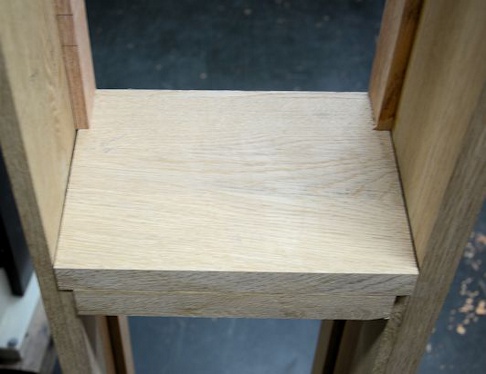
Exterior cedar flush panel with beads above, cherry
sidelights to the right, and interior cherry recessed panel
below. Lower right is the basic components to a door.
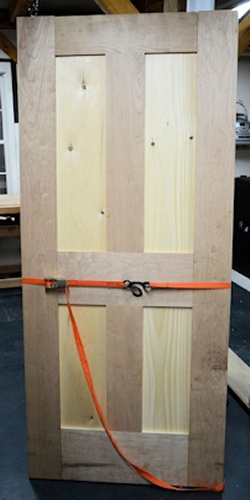
To the left are outside (beaded
flush panel) and inside (recessed
panel) of the dry assembled door.
The rails and styles are cherry
and the panels are pine.
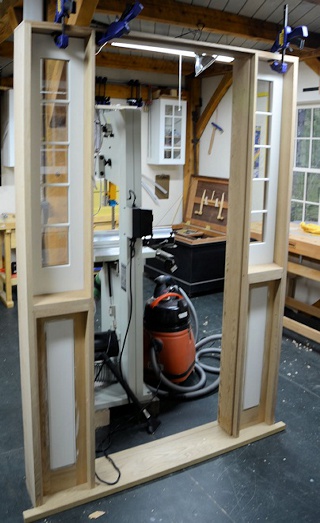
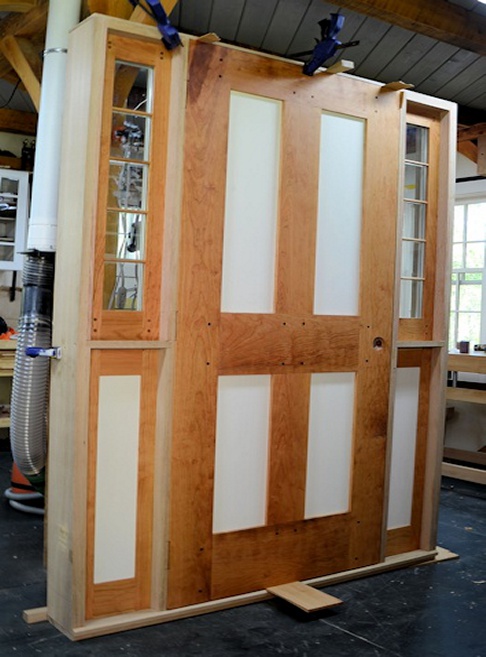
As I built the components of the entry door unit, I also built the jamb that would hold it all together.
The jamb and threshold were built of white oak, which along with locust is probably the toughest and
most weather resistant wood that we have in our native new england.
I decided to paint the interior panels for
a bit of a modern feel. The panels and all
of the trim and jambs are linen white.
The exterior is painted with a solid stain
to avoid future peeling and the interior is
an acrylic paint. The natural wood is
finished with 3 coats of hand rubbed
tung oil. All parts of the door unit and
hardware get fit and installed while it's in
the shop, then taken apart and brought
to where it gets installed and
re-assembled. The sidelights are
thermo-paned glass and will ultimately
get an outside storm panel to triple
glaze. The door gets a mahogany storm
door and lower panels have 2" of high R
foam in between the panels. The doors
each have weather stripping on 4 sides,
so the entire unit is extremely tight.
Here my brother Eric is demolishing the old
entry. We stripped it down to framing, re-framed
window and door openings, and insulated the
walls with closed cell foam (approx. R38). The
simple porch is sitting on 4 -PT 6x6's set on
concrete pads below frost level. The porch
framing is PT 2x8, the risers will be azek, and the
deck and treads will be mahogany. We re-used the
existing foundation and rounded copper roof.
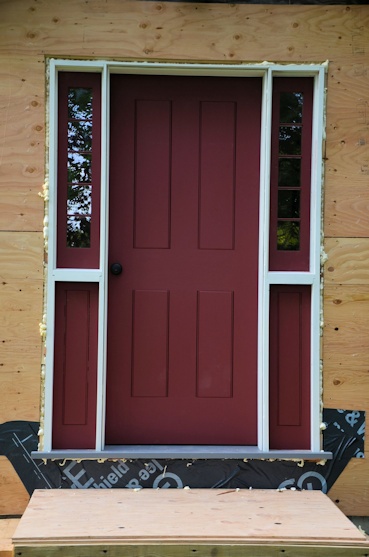
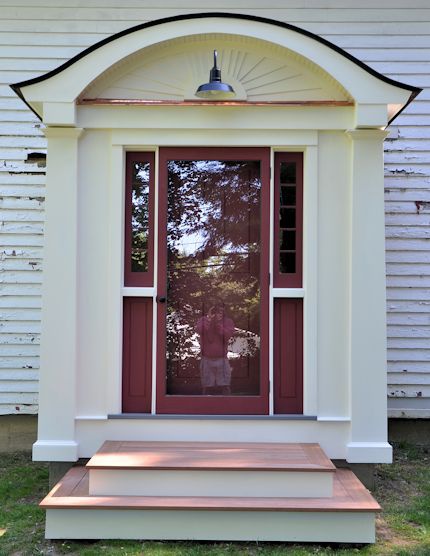
Right, we've installed the door unit and sealed it
with foam and rubber.
Left, the fr0nt of the entrance is trimmed in
semi-classical fashion. Columns and water
table are pretty typical Greek Doric
dimension, or as close as I could get with the
size of the existing house. Since I'm trying to
build in a way that will be relevant in the
50-100 years that I think is minimum
durability for a well built house, it makes
sense to stick with the Romans and Greeks in
styles that have lasted for thousands of years
to date. The simple mahogany storm door has
been added, built in simple mortise and tenon
style with tempered glass. I'm still waiting for
side windows to arrive, after which the siding
will be completed.
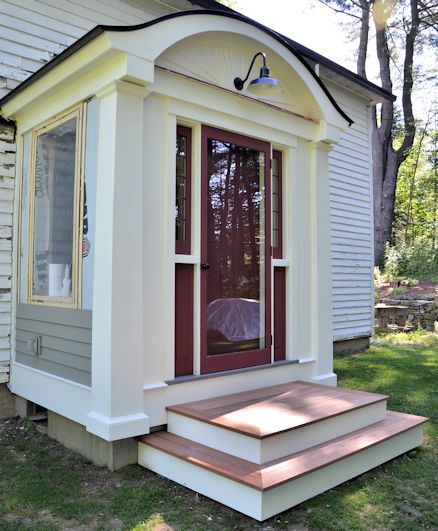
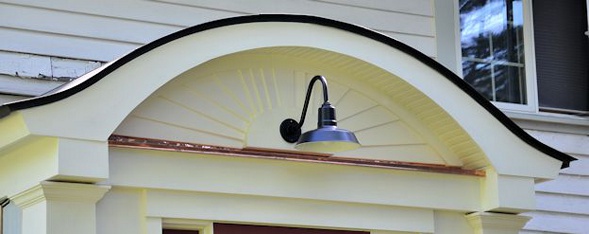
Right, a bit of a sunburst
pattern above the copper
drip detail and a barn
style light fixture.
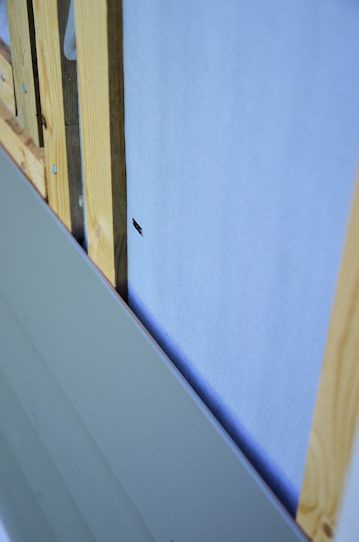
Left, the cedar clapboard showing the circulating air space that
exists behind all of the woodwork. If you'd like for your siding,
trim, and roofing to have maximum life with minimum
maintanance, you'll always want to keep air circulating behind
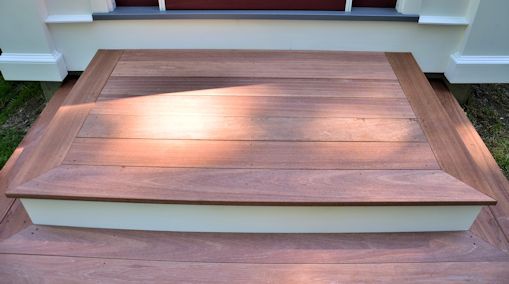
the weather face of it. Above, the ultra simple front step with
mahogany decking which will ultimately get a coat of oil as it
dries out. Following are some details on the entry door.
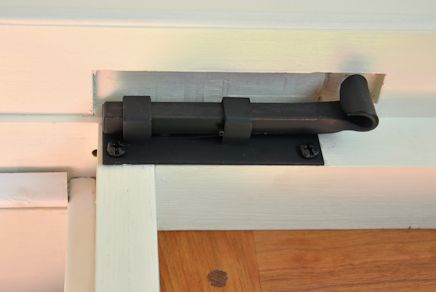
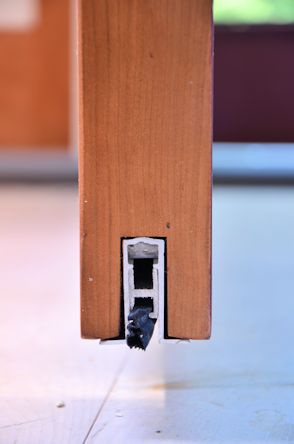
Above and right, a spring loaded
weather-stripping which fits in a
dadoe in the bottom of door, and is
driven into the threshold when the
rod above is pushed into the jamb as
the door closes for an extremely tight
fit.
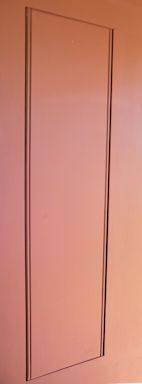
Below, the beaded, flush,
floating panel on the
outside of the entry door.
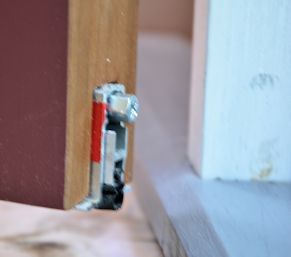
Left, I put extra slide bolts at the bottom and top of
both the main entry door and the storm door for
extra security and to be able to tighten door
against the weather-stripping for an absolutely
airtight fit. They will only be used when the door
won't be opened for a while, which will be often in
this case since doorway isn't in a heavy traffic
pattern. Below, different views of the entry from
outside and in. I especially like to design entryways
to be seen at night.
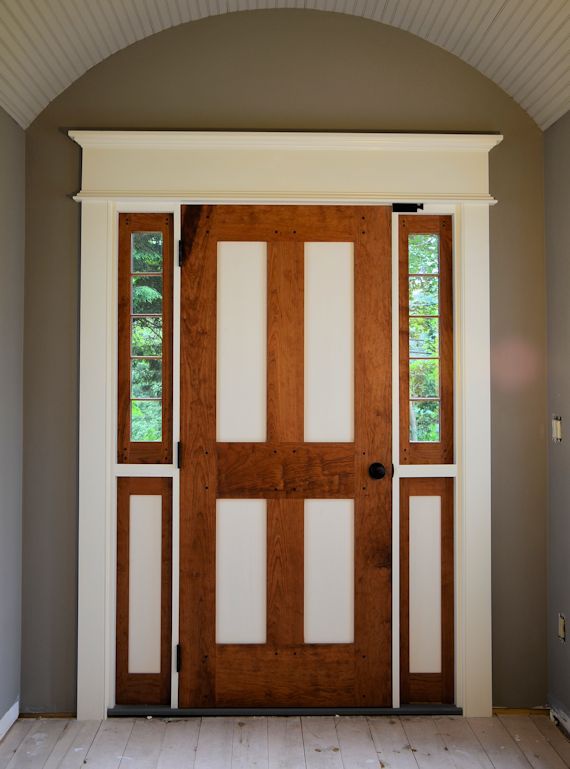
Below, finally the interior view showing the barrel vaulted ceiling and traditional trim
profile. Thank you for visiting, and if you enjoyed this blog, please forward it to anyone
that you think might enjoy it or find it useful. Any questions or comments, email right
here. Below the last picture you'll find a list of links to previous blogs. Enjoy your
summer!